A while ago I had planned a trip to, amongst other things, meet a few friends I had made online over the years. One of them already had gotten a fountain pen from me (he got a camera this time around) but the other had not got one. And I knew that he wrote with fountain pens. I fancied working with metal again and I knew that he is a supporter of West Ham United. So the scene was set.
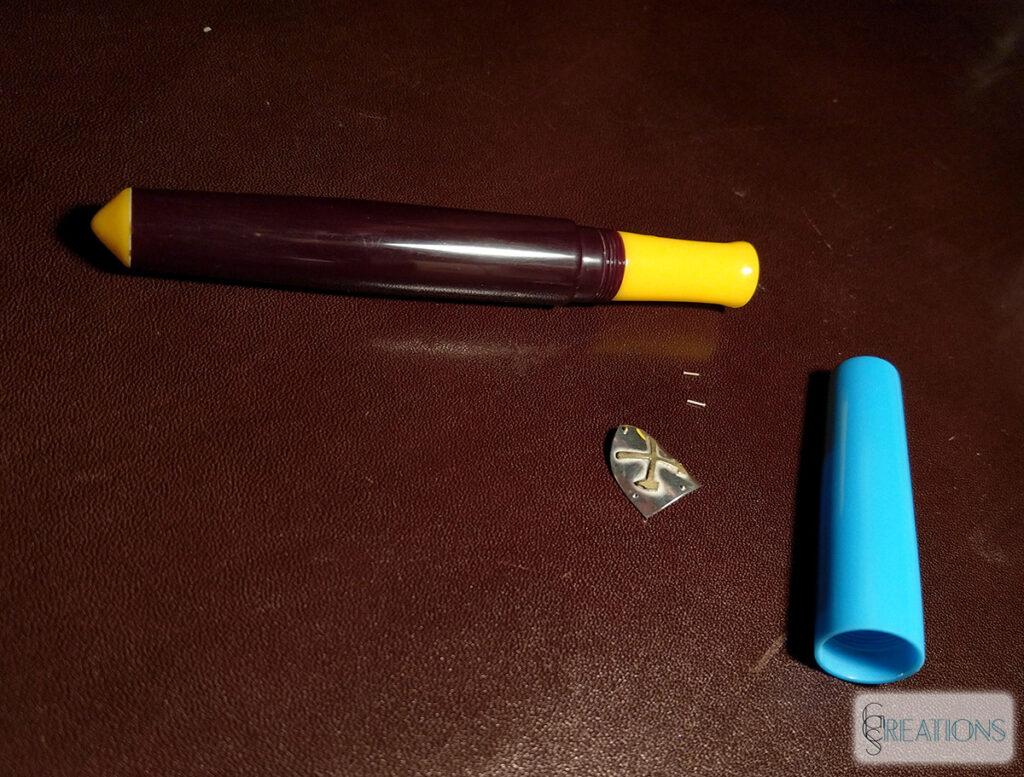
It didn’t take long until I saw the pen in my minds eye, I just needed to find pen blanks in approximately the right colours and make a sterling silver and brass crest that I could rivet to the pens cap.
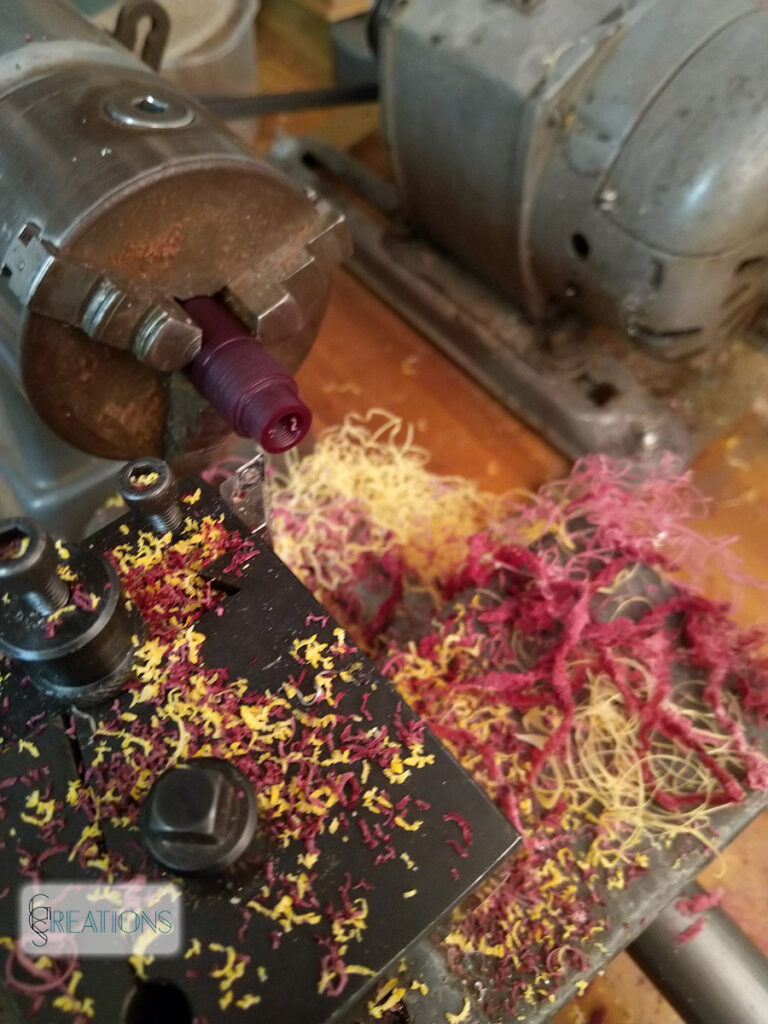
Already the swarf looked great!
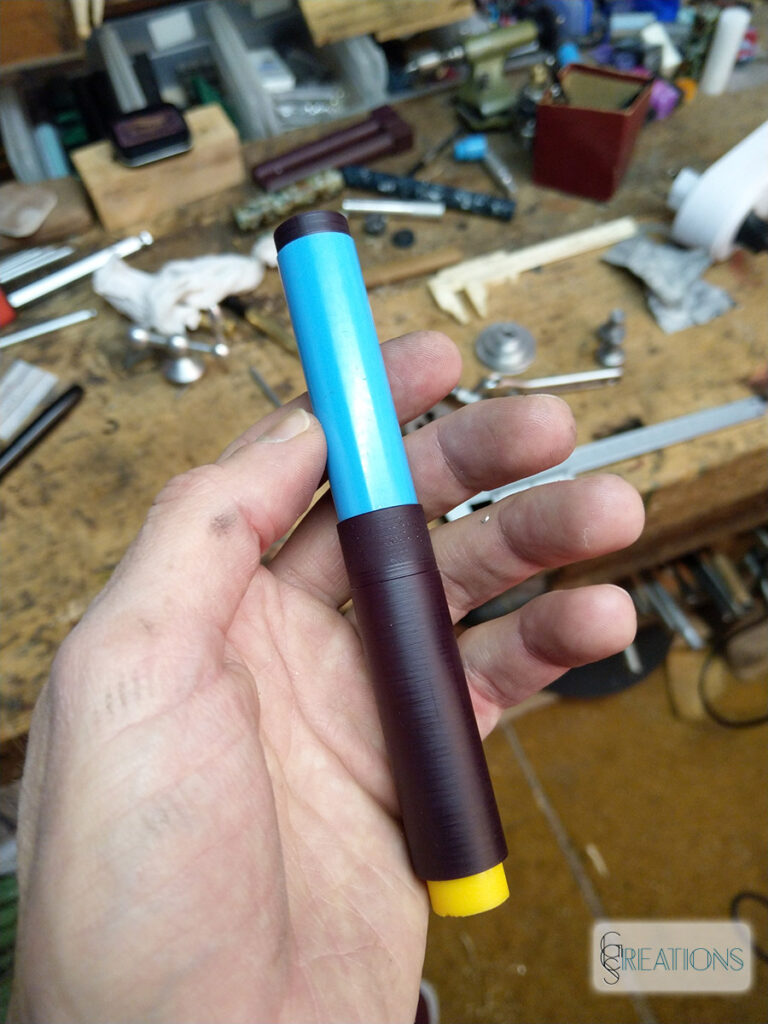
The main parts of the pen ready to be shaped
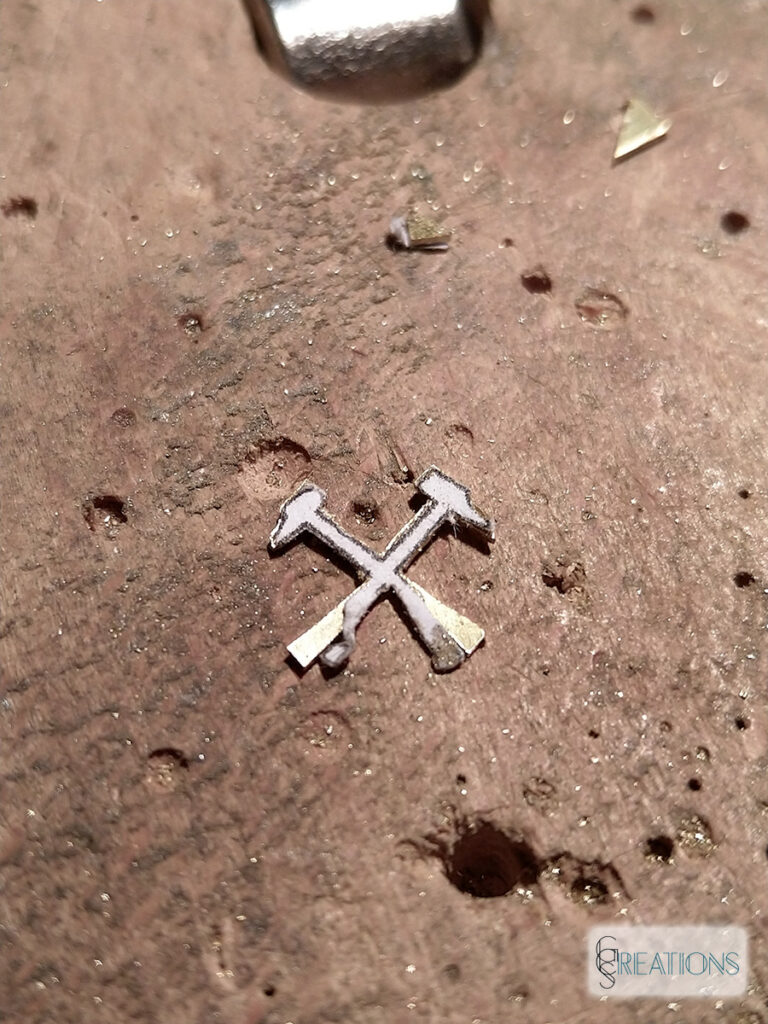
For the football clubs logo I went with just the crossed hammers, for simplicities sake. Here it is sawed out, nearly ready to be soldered to the sterling silver plaque I had made earlier. I designed the outline on my PC and printed it to a regular sheet of paper which I glued to the brass sheet.
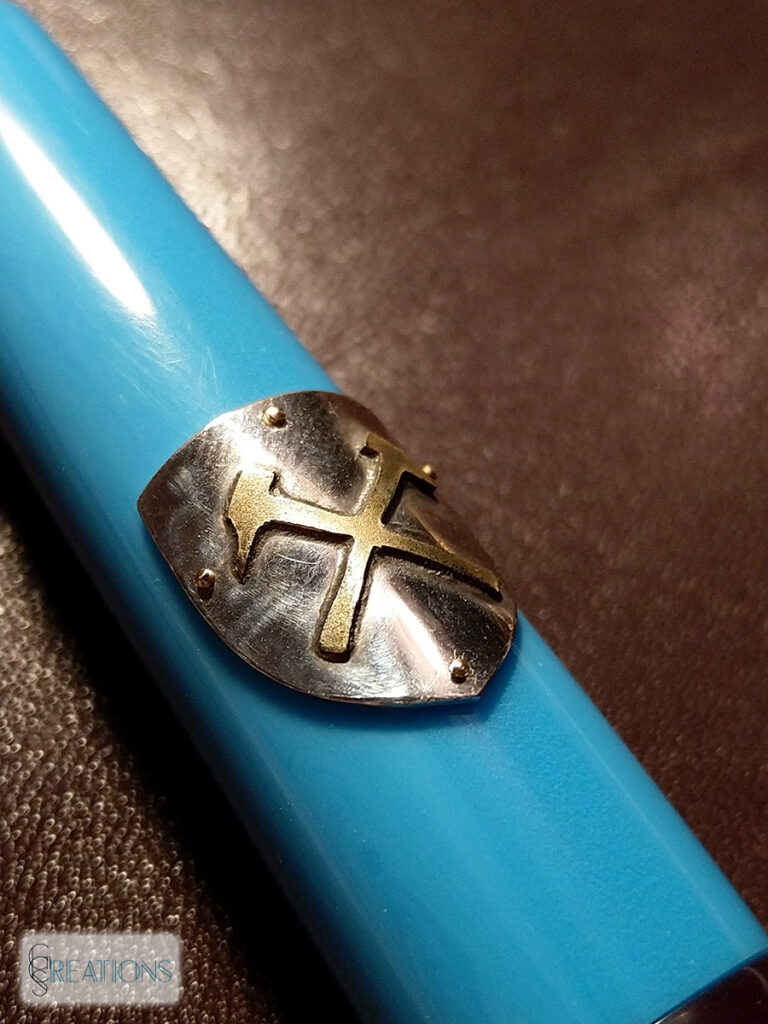
Yes, in hindsight the perfectionist in me wishes that I could have got the hammers handles straighter.. On the other hand I wanted it to look handmade to a certain extent, since it is. But who am I kidding, I should probably just use my jewellers saw a tiny little more often!
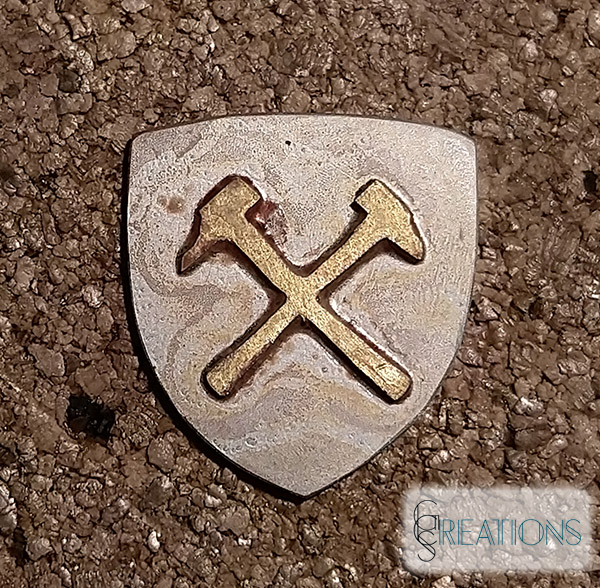
I realised that I also would have made a brilliant ring!
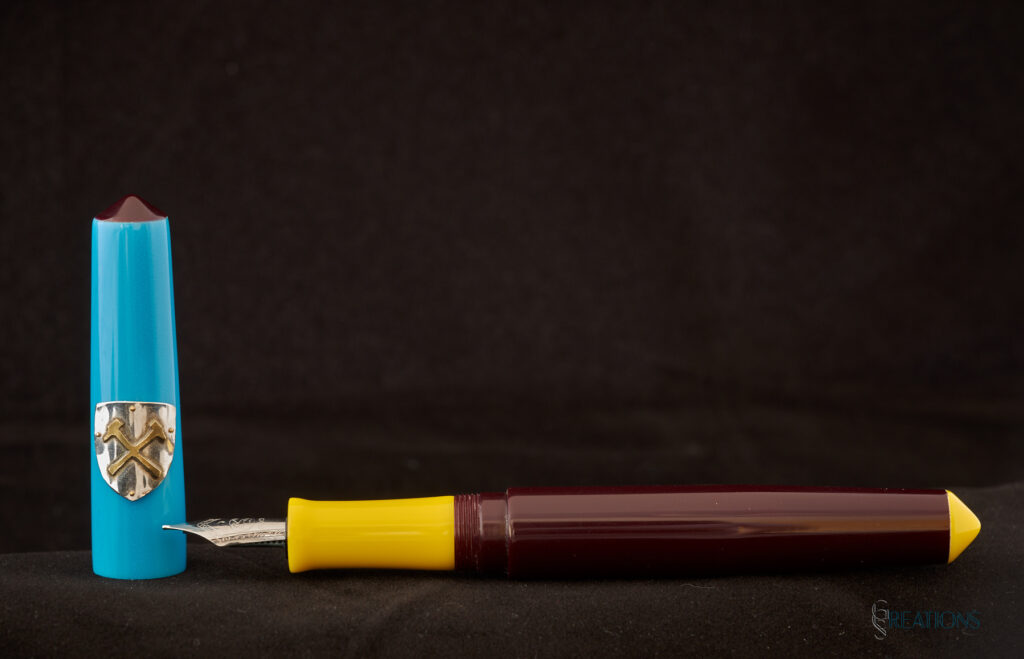
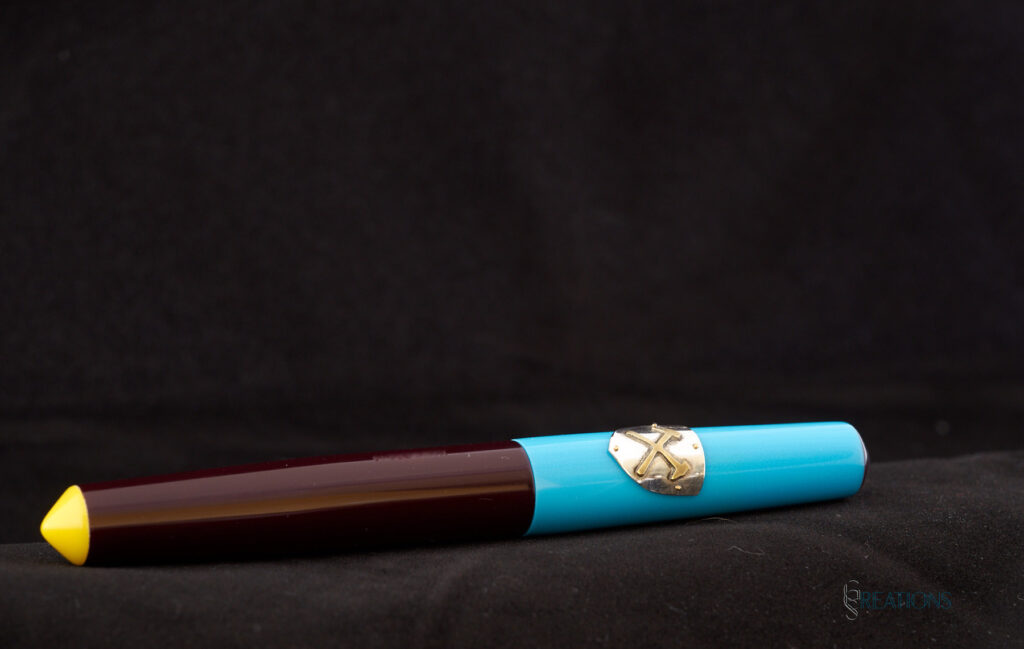
Here we’ve got the pen ready to be assembled
I decided to secure the little rivets with some expoxy glue on the inside of the cap, just to make sure definitely none escapes.
To be honest, I just was looking for something to post again.. :p
I found this pencil along with a Wahl Eversharp Coronet Pencil (might be a later post) and two “MIOSOTIS” fountain pens, made in Austria, in a box in the cellar.
The material was a bit tarnished and the brass very dull, which was amended fairly fast. 🙂
Again, a bit of Brasso does wonders! And by judging on what I’ve recently acquired on ebay I’ll be using a ton of the stuff soon!
The body was “roughly” polished with micromesh, but I didn’t want a mirror finish so stopped somewhere around 7’000 grit.
Otherwise I really have no idea about this pencil, it looks a bit like a ‘kit’ pencil, and since a fair few of my ancestors were woodworkers it may be something like that.
Before polishing
Disassembled – a fairly basic mechanism!
and after polishing!
Thanks for reading, I hope you’ve enjoyed it & as always, stay tuned!
I was fairly busy over the past few weeks and couldn’t get as many photos as I would have liked.
Obviously I’m biased, but this is hands down the most exciting and fun lens I’ve used up to now. IQ is pretty surprising with a pleasant soft focus effect which can be remedied very easily with a an “aperture” stuck on the front of the lens.
There’s hardly any colour aberrations, I seriously don’t think that I have many lenses with this little purple fringing, and whilst contrast isn’t always there the colours still come over as fairly strong.
The swirl is obviously cool, but it’s not the only thing this lens has. I can’t quite put my finger on it yet but there’s something to the rendering that makes is distinctively look old.
On film it really shines and it’s rendering looks even older than on digital.
Below are a few examples
Dreamy Soft-focus – Shot on my Pentax K-1
Spring Flowerbed – Pentax K-1
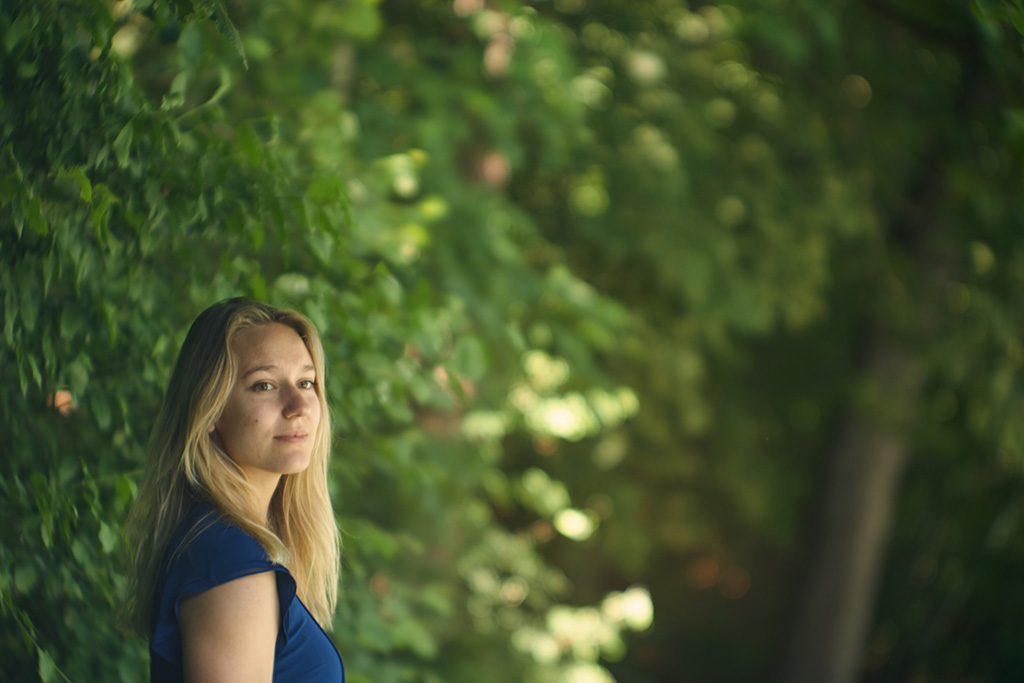
Walking – Pentax K-1
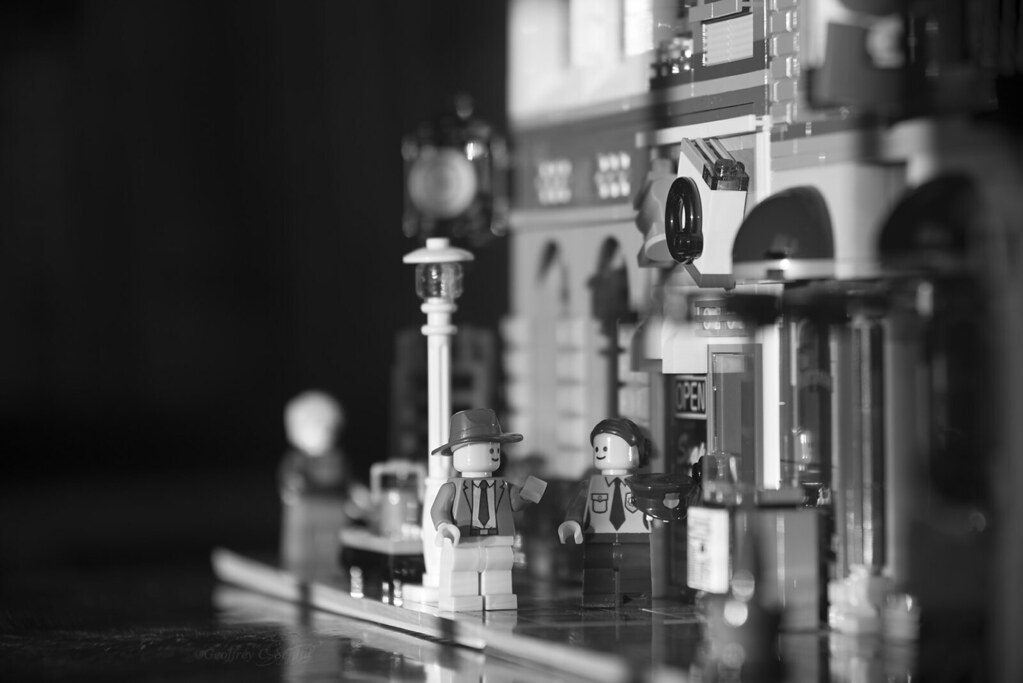
A Lego Romance – Pentax K-1 – I used a front mounted aperture here to improve sharpness.
And then I tried it on film.. -and my god is the rendering different on film! It instantly looks to much older I hardly could believe my eyes!
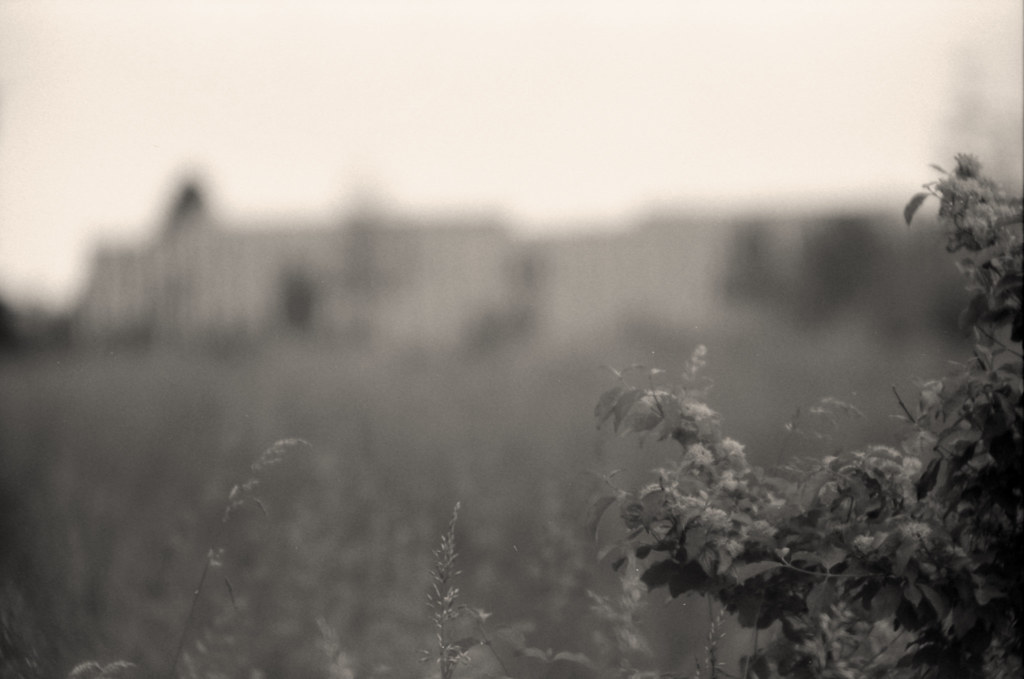
Park Shrubbery – Pentax ME-Super – Ilford FP4 Plus
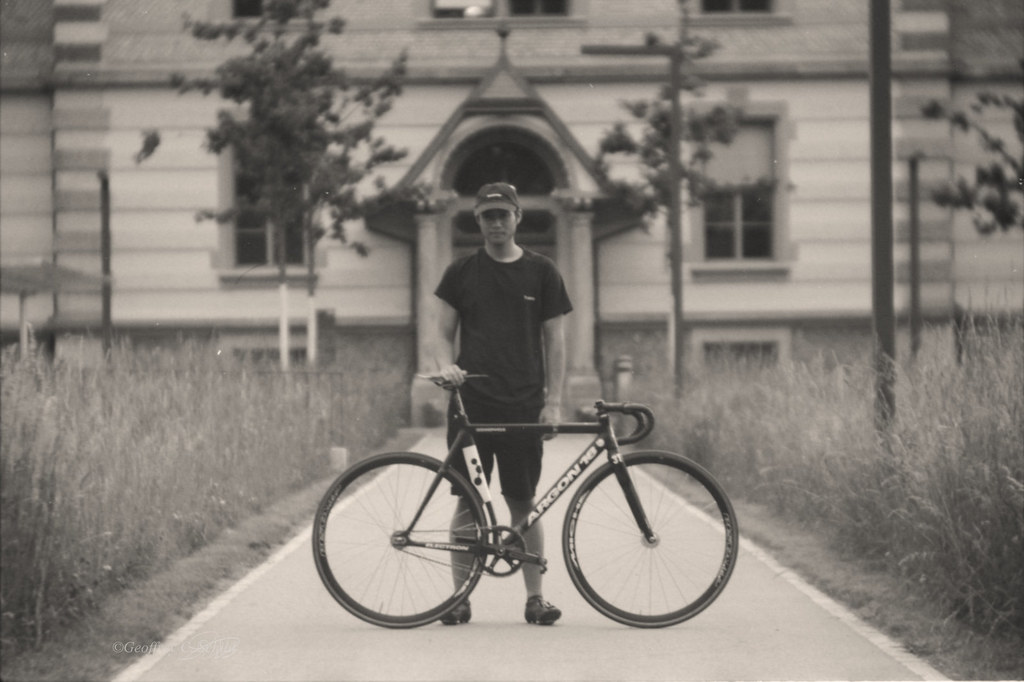
My mate and his bike. Sadly he doesn’t own a Pennyfarthing! – Pentax ME-Super – Ilford FP4 Plus
You can click any image to be taken to it’s flickr album I created for this lens. It will gradually fill up more and more as I love using it!
Thanks for reading, I hope you’ve enjoyed it & as always, stay tuned!
We’re on the last >build< part of the “Petzval-Adaption” journey. I’m not sure if it ever will be finished. 😉
In the last post we put together the adapter. In this post I’ll ramble about the finish I applied and in the next one we’ll see some photographic results! 😉
I knew from the start that I wanted to have a ‘classic’ finish that suits the brass lens well, think warm colours and old techniques.
I decided on regular wood stain, bought as a powder and dissolved with water, and shellac which I had left over from a past fountain pen repair. (Yes, some old fountain pens used shellac as a replacement for glue.)
Here are the parts I’ve used in this post:
– “Nut-brown” stain
– Retainer to stop the lens from slipping upwards out of the adapter (the bar on top)- Miniature hinge to hold the retainer on one side and a strap to lock it down
– Apertures that attach to the front of the lens.
– Two turned brass screws to attach the apertures to.
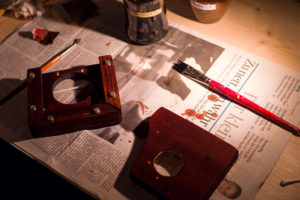
I believe these images are after 7 layers of stain.
Left: Applying the stain, over the screws and everything for an aged look.
Right: A small test fit. Couldn’t resist!
Sadly we’re going to have a little jump here.. I haven’t got any photos of me applying shellac or attaching the strap or anything really.
Well done me!
Applying Shellac is fairly easy, unless you want to get a high end shine. It dries pretty fast too and personally I like how it feels to touch. It really gives the cheap wood I’ve used a ‘premium’ feel.
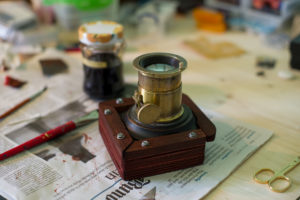
So, let’s make the jump to the finished product:
Attached to the small ME-Super. It suits it I think!
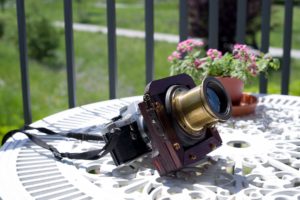
Chillin’ in the sun.
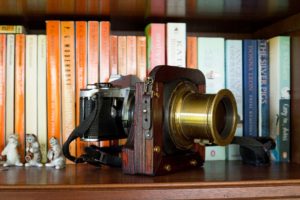
The Petzval on the K-1
So.. what’s left is to show you the photos. I’ve yet to get through the film in the ME-Super (FP4 Plus 125) but from the results I got on the K-1 I really couldn’t be happier!
Thanks for reading, I hope you’ve enjoyed it & as always, stay tuned!
As promised, here’s a step by step to how I built my Petzval’s adapter. This will be a very image heavy post and I apologize in advance if I don’t quite nail the formatting…
In my last post I left you with the lens disassembled. I did this for two reasons.
1) to verify that it is an actual Petzval design and that the elements are all assembled in their correct orientation. Note: be careful taking apart a lens of this age, I have read about cases where the glass cracked during reassembly. We don’t want that.
2) to clean and polish it a bit.
Before a quick polish with Brasso
and after!
I do admit, I was a bit skeptical about how that rough polish turned out, but I very soon noticed that it suited it quite well.
Next I disassembled a Cosinon 135/2.8 I got for free a while back and was in a really bad condition to salvage it’s m42 mount.
Here I’m in the planning stage. If there ever was any more planning than a vague idea!
100% professional set up.
Yeah, I drilled those holes nicely, didn’t I?..
Right here I’d like to mention that I measured the Flange Focal Distance by holding the lens to a wall and measuring how far away I had to move it in order to receive a sharp image on said wall. With that I calculated how many sheets of plywood I’d roughly need.
Anyways, I’ll let a few pictures speak at this point.
This fits around the lensboard an acts as a ‘spacer’.
A snug fit!
This frame mounts to the spacer and retains the lensboard.
After a few hours of scratching my head I ended up with these parts here
What I did not take photos of is me cutting the ‘screws’ to hold the whole thing together.
I used a threaded rod and cut it to size with the help of a dremel and used a nut on either side to create sort of a bolt.
The front ‘frame’ part, into which the lensboard slides, is attached with six of these bolts, which drive through the first four layers of the adapter and the rear part is attached by means of four bolts, creating an overlap of two (three in my newest revision) plywood boards.
I decided to build the adapter in two parts in case I need to adjust something or would like to create a tilt/shift adapter without needing to build the whole thing again and the above way seemed the safest solution.
The cut-outs on the pieces in the top row are to accommodate my fingers when holding the camera. I initially tried without them but quickly noticed that it was impossible to hold the grip without a cut-out!
Making sure everything will go together correctly.
Can’t clamp something down well enough!
And here’s the rear facing side. The left one gets stacked onto the right one, in case you were confused!
Front facing view of the rear (L) and the front (R) part.
And finally, the two parts screwed together, combined and mounted to the K-1!
If you look closely you’ll notice a few things that aren’t quite correct yet, namely the orientation of the rack & pinion focus and the lack of the pinion.
One of the “original” screws wasn’t the correct one and I spent a considerable amount of time looking at possible screw threads used towards the end of the 19th century. You wouldn’t think so, but it’s actually quite an interesting topic!
Part three will follow in the next few days.
Thanks for reading & stay tuned!
First off a bit of info concerning my background in photography:
My family did not have a digital camera for quite a long time and in late 2013(!) finally got a Pentax K-50. The K-50 got company a year ago in the shape of a K-1.Back to 2014.
In February a friend of mine suggested that I should get myself a version of the well known Helios 44.
The swirly bokeh intrigued me, and thoroughly bored with the 18-55mm kit-lens I ended up with a KMZ Helios 44k-4.
Shortly after that I visited my local photo store, where upon asking if they had any M42 lenses the owner disappeared in the cellar and came back with a box containing a Pentax SMC Takumar 28/3.5 and 150/4, both including their hoods and cases, and 5cm of extension tubes.
He offered to sell me the lenses for 20$ each and gave me the tubes for free. Brilliant value if you ask me!
From there on there wasn’t much stopping me really, I quickly had a list of lenses I’d like to acquire and also bought a few more that year, but I really can’t remember which one was the next one!!
After racking up over 20 lenses and working myself through (nearly) my whole wishlist I started thinking what I could do next.
I kinda fancied doing something different, more unique.
When I saw that Lomography started a kickstarter for their Daguerreotype Achromat in Pentax K mount I became interested in the design, but did not want to shell out the cash for such a simple design (sorry Lomography!), besides, I was far more interested in their Petzval model than the Daguerreotype, but the Petzval wasn’t available for Pentax.
So, the logical conclusion, to me, was that It’d be way cooler to adapt a proper old lens to work on my K-1.
So the past year I started researching old lens designs and photography methods and became fascinated by the simpleness of many lenses and their unique rendering, especially compared to today’s contemporary lenses which are, usually, fairly ‘sterile’.
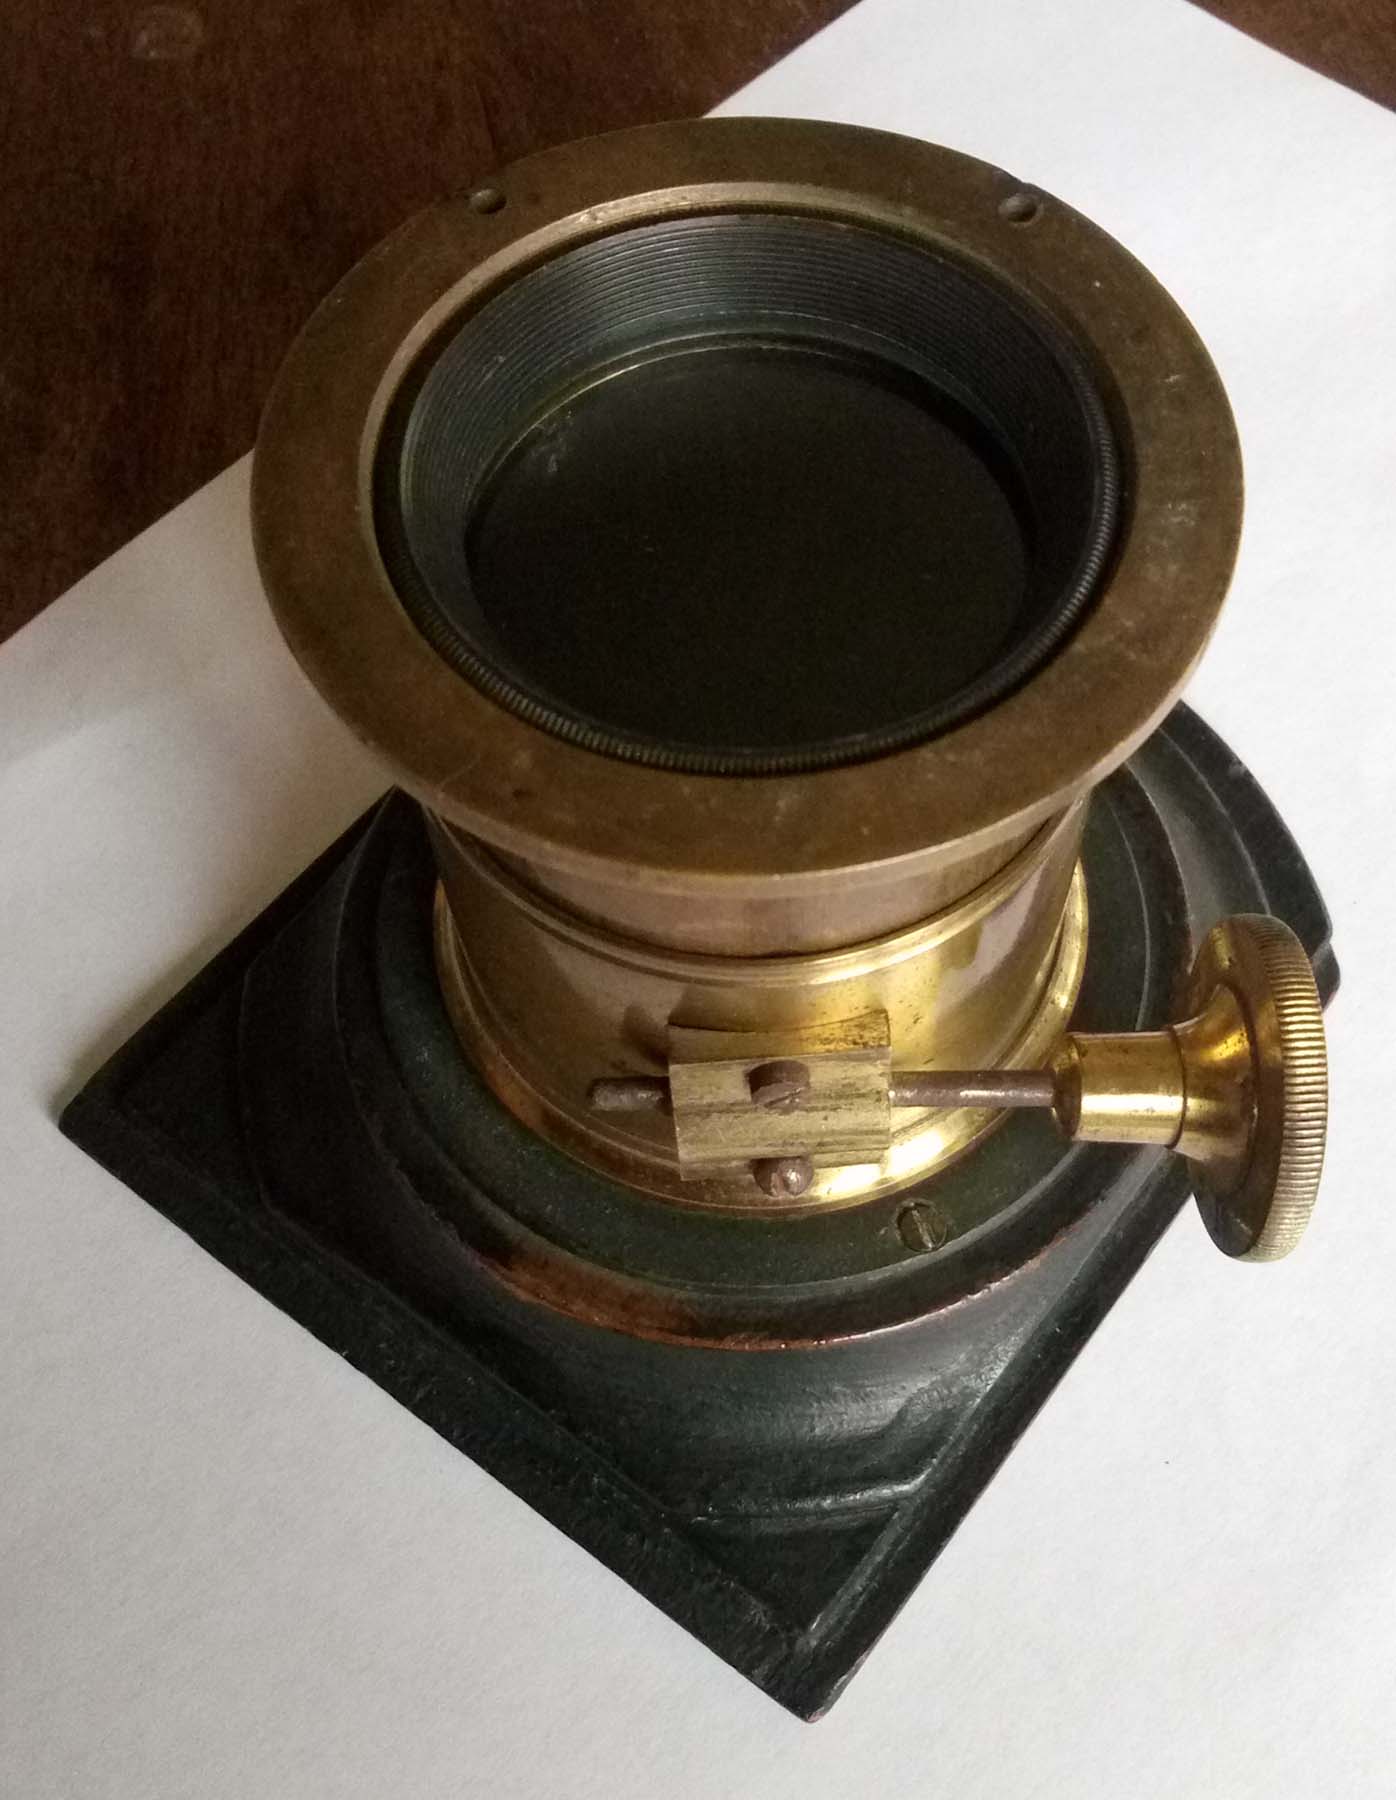
By chance I started looking for Petzval design lenses on Ebay this April (everyone trawls Ebay late at night from time time, right?) and found one of relatively short focal length including it’s lens board.
The front element. Only visible from certain angles and doesn’t show on images.
Now, I knew it had no aperture but who stops down a Petzval anyways (I thought) ? The rack & pinion gear looked complete, the glass pretty scratch less, though it does have some marks which might be slight element separation or the remains of a removed fungus on the front element(s).
The lens that started this blog! 😉
But the most important thing to me was that it’s focal length wasn’t larger than 150mm and that it had a Flange Focal Distance large enough to work with.
The lens board however was what really made be buy it.
So here I was, looking at this lens older than anything else I own, (bar a wardrobe, but I can hardly hold that in my hands and thoughtfully muse about it) absolutely fascinated by the simplicity of it.
I disassembled it the same day and started on the adapter the next day, but that will have to wait for part 2, which should be posted in a few days time!
I’m Geoffrey, I’m 26, and this is where I’ll post about my ongoing projects, photography as well as other random tinkerings & turning experiments.
Currently I’m very interested in all kinds of vintage optics, cameras & tools, books, fountain pens and classic cars. You won’t see me outside of the house without a flat cap (or a bicycle helmet) often.
Apart from the above my hobbies are playing the drums and guitar, bicycle trials, some pc-gaming, and obviously photography and DIY projects.
I myself am not entirely sure what to expect of this as I’ve never had the pleasure to entertain a blog before now, but I’m pretty sure that I won’t be making extremely regular updates to it when not in the midst of some project.
My first post will be about how I’ve adapted a 1880s Magic Lantern Petzval lens to my DSLR.
Stay tuned!